Nailed it with Lindie - Dec 2019
6 steps to this house Advent Decoration


6 steps to this house Advent Decoration
In the light of the upcoming summer holidays, this is a project for all the craft lovers and do-it-yourselfers in the family. Yet again I used whatever I could salvage from hubby's garage and my craft box.You will need:
- Lumber pine (in preferred length and size)
- 5cm copper couplings (one or two for each house)
- Mitre or band saw
- Safety goggles
- Drill
- Forstner drill bit (to match the size of the couplings)
- Sandpaper
- Paint
- Glaze coat /wax (optional if using chalk paint)
- Paint brushes4 candles
STEP 1
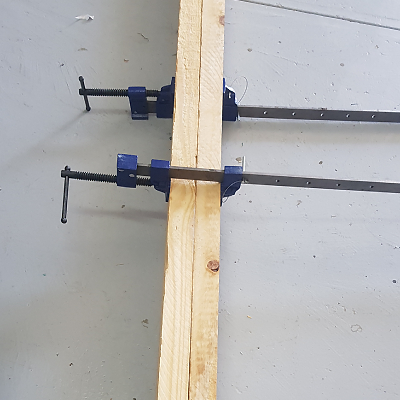
As I didn't have square lumber, I glued together 2 beams to have a 10x10cm beam.
STEP 2
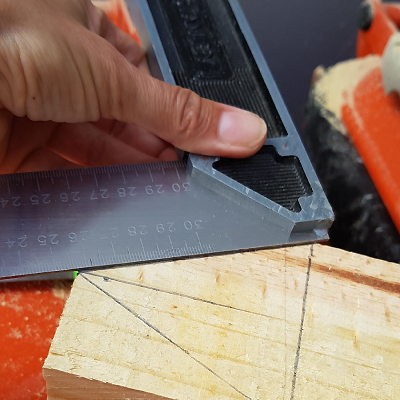
Measure the length for 2 houses, as well as the roofs (the roofs will be on both ends of the lumber). Cut lumber to size.
Repeat this step until you have the number of houses you prefer.
STEP 3
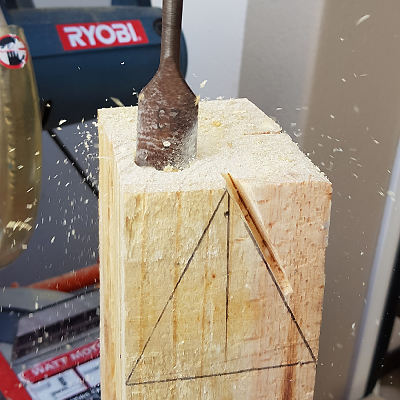
Using the Forstner bit, drill the holes for the chimneys BEFORE you cut the sides for the roof.
STEP 4 & 5
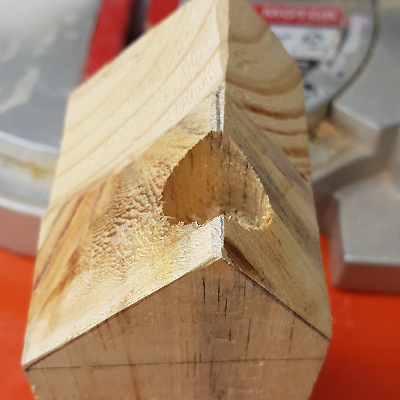
Cut the sides for the roof for both houses and then cut the lumber in half to have 2 houses (It is easier to cut the roofs when the lumber is a longer piece).
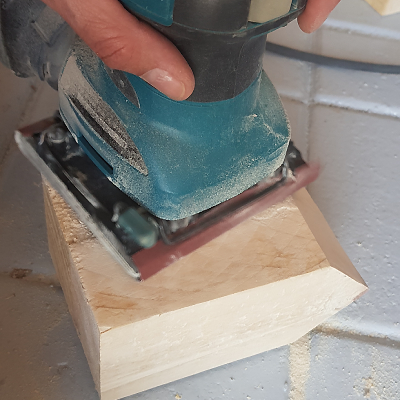
STEP 6 - 8
Sand the houses and brush off any dust with a clean, dry paintbrush. (Hubby got carried away, and I ended up with houses in different shapes and sizes
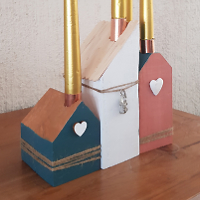
RESULT
Lindie is married to John Loock. She lives in Swakopmund and has three children.
She enjoys crafting, designing and exercising in her spare time.

Lindie Loock